|
Created by: |
SNP |
|
Client-dependent: |
No |
|
Settings as variant: |
No |
|
Support for RecycleBin: |
Yes |
|
Support for initial Housekeeping: |
Yes |
|
Recommended for HANA pre-migration housekeeping: |
Yes |
|
Pause/resume support: |
Yes |
The PSA Cleanup is part of the Business Warehouse deletion tasks.
The Persistent Staging Area (PSA) is the inbound storage area in BI for data from the source system. Requested data is saved unchanged from the source system.
Requested data is stored in the transfer structure format in transparent, relational database tables in BI.
If regular deletion does not take place, data from PSA tables can grow to an unlimited size. In applications, this can lead to poor system performance, while from an administration point of view, it can cause an increase in the use of resources. High volumes of data can also have a considerable effect on the total cost of the ownership of a system.
In SNP Outboard™ Housekeeping, it is possible to delete data from PSA tables using a retention time.
1. In the main SNP Outboard™ Housekeeping menu, select Business Warehouse > Deletion Tasks PSA Cleanup and click Settings.
2. Specify your desired settings. You can create new settings by entering a new ID or choose from existing settings.
For more information on settings, refer to the Creating a settings ID chapter of this user documentation.
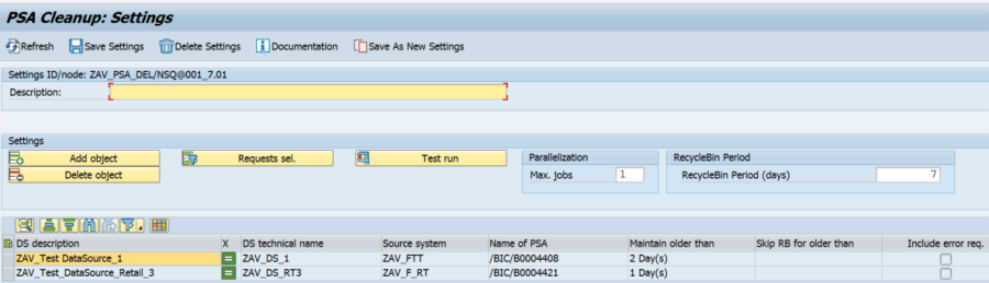
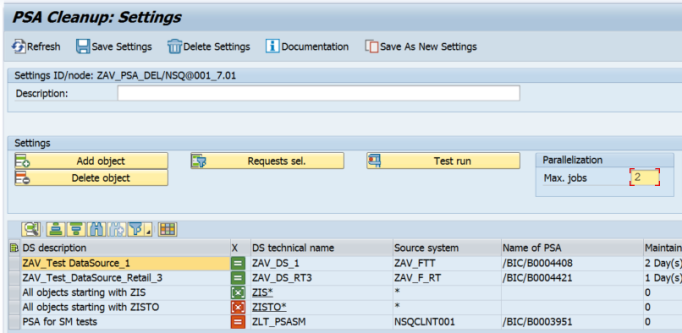
PSA Cleanup – Settings
You can edit the created settings group. To save your changes, click Save Settings in the taskbar.
Step 1
1. You can specify the DataSource name(s) by clicking Add object.
2. From the list of available DataSources (F4), select which ones you want to add to the newly created settings group and then confirm your selection.
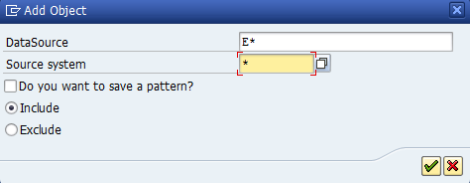
3. You can specify the source system as an additional filter for DataSources. The options Include and Exclude determine if the result of a selection will be added or removed from a selection.
4. You can set the DataSource name in a pattern style.
5. By selecting Do you want to save a pattern?, you can skip the selection of PSA tables. This is useful if you create settings at the group level.
PSA Cleanup – DataSource selection
6. After confirming, select the PSA tables that you want to clean up and confirm your selection again.
The selected PSA tables will be added to the settings group list.
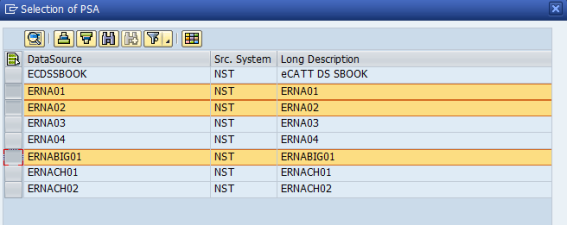
PSA Cleanup – PSA selection
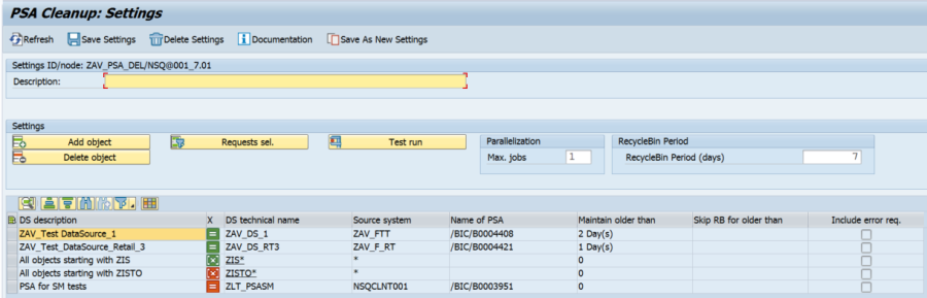
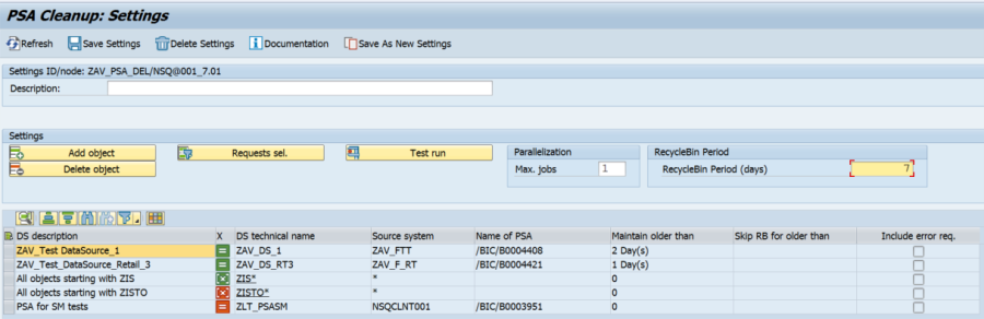
PSA Cleanup – Settings with patterns and objects
Icons in the X column indicate how the lines will apply to the overall list of PSAs:
 The pattern will be evaluated during the task execution, and the PSAs will be added to the overall list.
 The pattern will be evaluated during the task execution, and the PSAs will be removed from the overall list.
 The PSA will be added to the overall list.
 The PSA will be removed from the overall list.
If the pattern is added, you can click its technical name to display an evaluation of the pattern and show the list of PSAs.
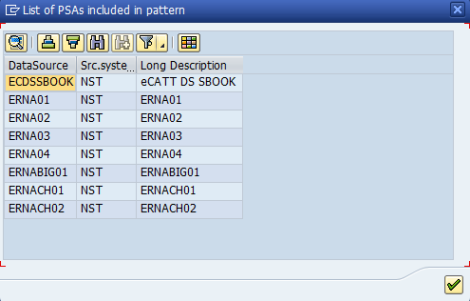
PSA Cleanup – List of PSAs included in the pattern
Step 2
By clicking Select requests, you can specify the time period for the deletion of relevant entries in selected PSA tables and exclude/include the requests with an error or archiving status from the processing. From SNP Outboard™ Housekeeping version 2.54, there is an option that enables the direct deletion of PSA tables by skipping the RecycleBin use.
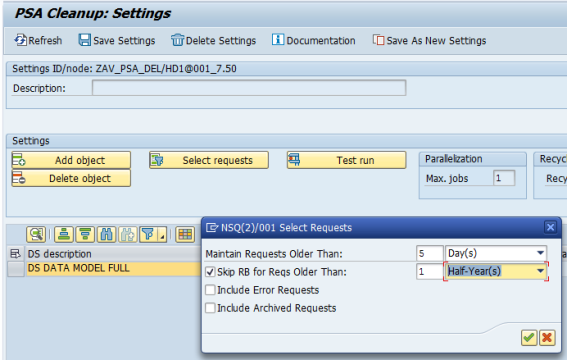
PSA Cleanup – Time period settings
Step 3
Test Run for settings: This run builds the overall list of PSAs, scans them and identifies all request IDs that fulfill the Time period condition. After Test Run execution, the screen Requests to be deleted opens with a list of relevant request IDs, DataSources and source systems.
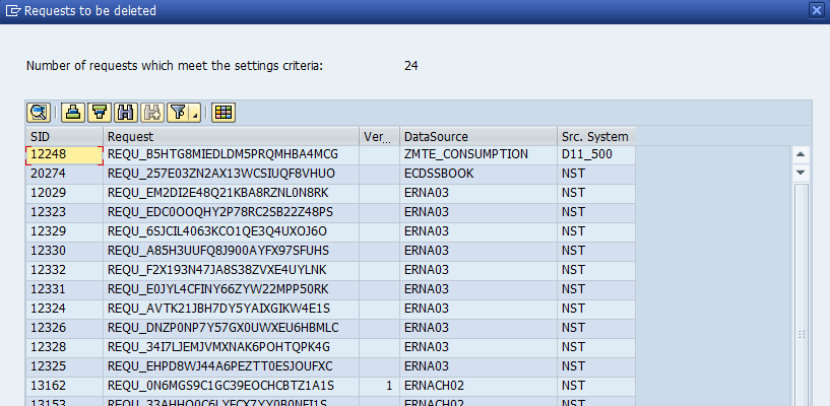
PSA Cleanup – Test run result
Step 4
The next step is to set the time limit for the RecycleBin. Enter the value in days in the RecycleBin Period field or leave the default value, which is 14 days.
PSA Cleanup – RecycleBin Period
Step 5
You can define the maximum number of jobs that can run in parallel by using the input field Max. jobs on the right-hand side.
PSA Cleanup – Parallelization – Max. jobs
Once the settings for the task PSA Cleanup have been specified, you can run the created/modified settings group from the main menu. There are several options for starting the deletion. For more information, refer to the Executing and Scheduling Activities chapter of this user documentation.
You should specify the settings ID when executing/scheduling the activity.
To check the status of the run, you can go to the monitor or check the logs.
We recommend periodically deleting the following requests:
-
All incorrect requests
-
All delta requests that have been updated successfully in an InfoProvider and for which no further deltas should be loaded.
It helps to reduce the database disk space usage significantly. Our recommended retention time for PSA tables is 15 days. The task should run daily in general, but this frequency is application-specific.