Step 4: Schedule the monitoring of a custom KPI
The last step is to start the monitoring of the KPI for a specific system with its assigned custom monitoring profile.
If you previously created a collector job for the monitoring profile of your custom KPI and if it is scheduled, you can check the Collector jobs tab for more information.
For more information about how to schedule and start the monitoring KPIs belonging to a monitoring profile, see the chapter Schedule the Monitoring of KPIs.
Proceed as follows if you have already created a collector job for the monitoring profile of your custom KPI:
-
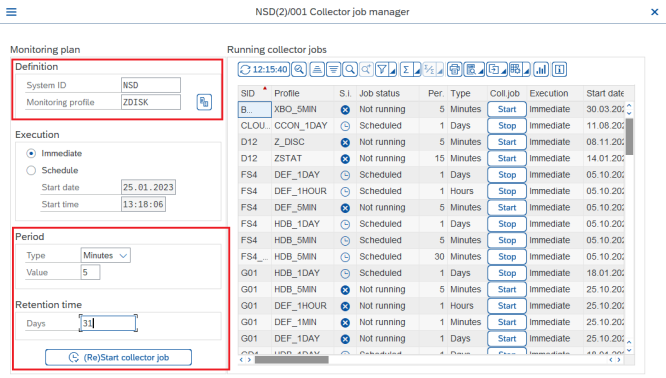
Go to the Collector jobs tab.
-
Find the monitoring profile and click Stop or Start in the Coll.job column.
In the fields Last status icon and Job last status, the status icon and a description of the status are displayed when the collector job run is completed.
If you did not create a collector job for the monitoring profile, please see the example below on how to start the monitoring of the custom KPI.
-
Go to the Collector jobs tab.
-
Click Create collector job.
-
Fill out the System ID on which you want to monitor the KPI.
-
In the Monitoring profile field, enter your custom monitoring profile.
-
Adjust the fields under Period and Retention time according to your requirements.
-
Click (Re)Start collector job.
Once the collector job has been executed successfully, you can display the results of your custom KPI on the main screen. For more information about displaying KPIs, see the chapter Displaying KPIs.